
This week I finally got around to a project that I’ve been wanting to accomplish since… um…. 2001? 2002? A DIY Succulent Wreath!
Yeah. I’m not a procrastinator at all. Better late than never, right?
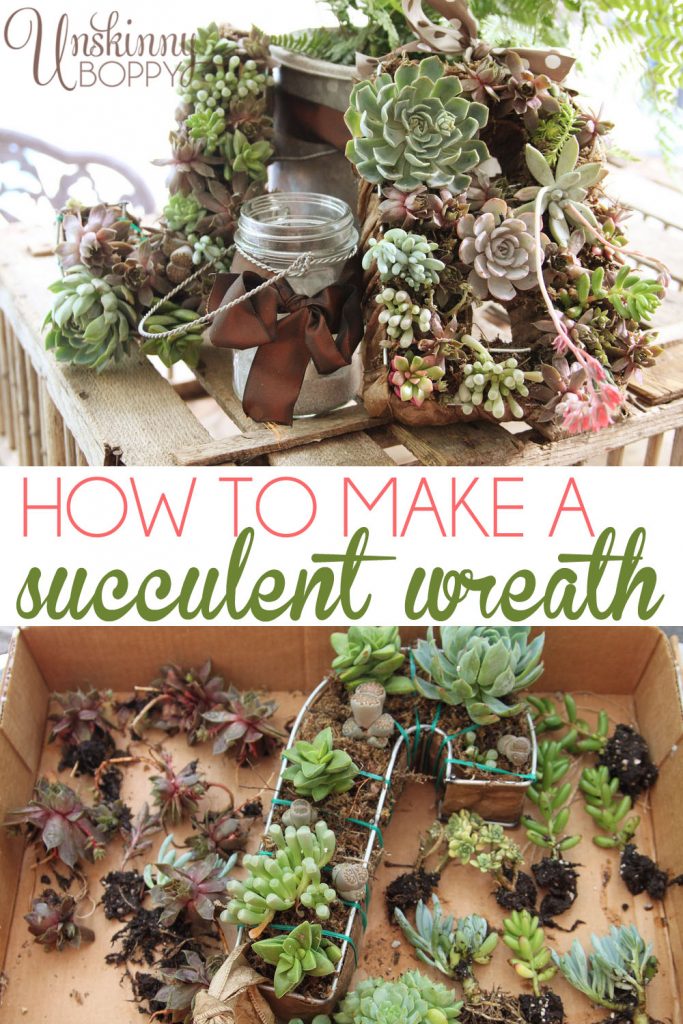
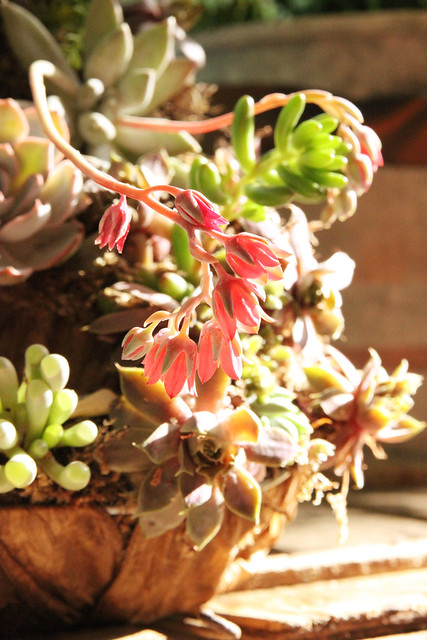
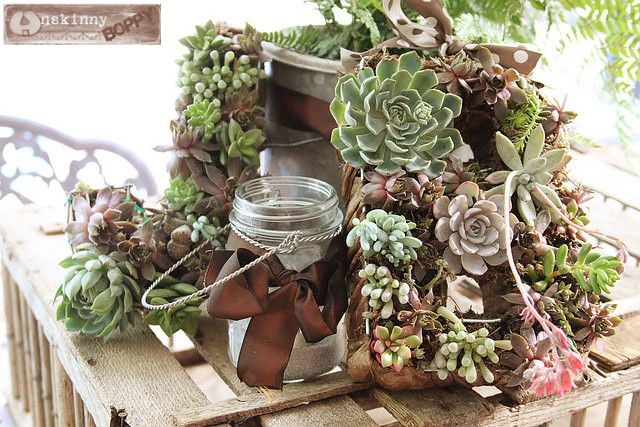
I created these DIY succulent wreaths today in just a few hours, and I wanted to show you how to do them yourself. I’m just so completely in love with the way that these turned out. If you can’t tell from the first photos- they are initial wreaths! One letter for each person in our family.
Here is a quick run-down of what you’ll need for this project:
Supplies Needed
- Variety of Succulents
- Wire wreath form
- Sphagnum peat moss
- Sand/Soil
- Floral Wire
- Sturdy 2″ ribbon (wired is best)
- Pencil or Pen for poking
I found these wireframe letters at Urban Outfitters, and my mind immediately wandered to the awesome succulent wreaths I had been pinning on my Pinterest boards. So, I knew what I had to do. I decided to get an initial for all three of us – B for me, G for Garrett and J for J.
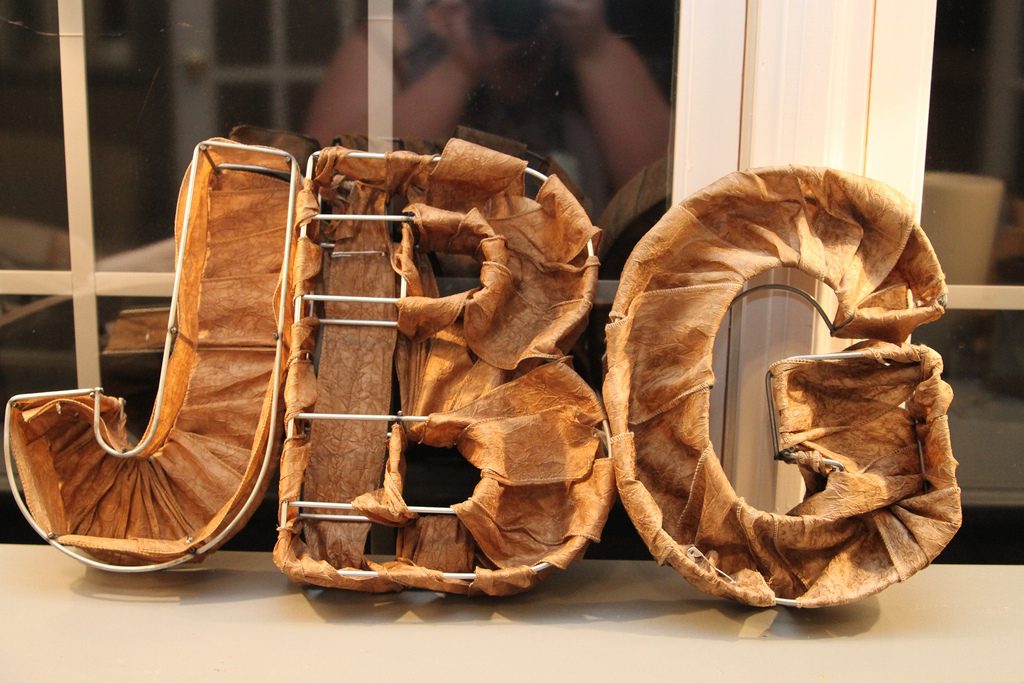
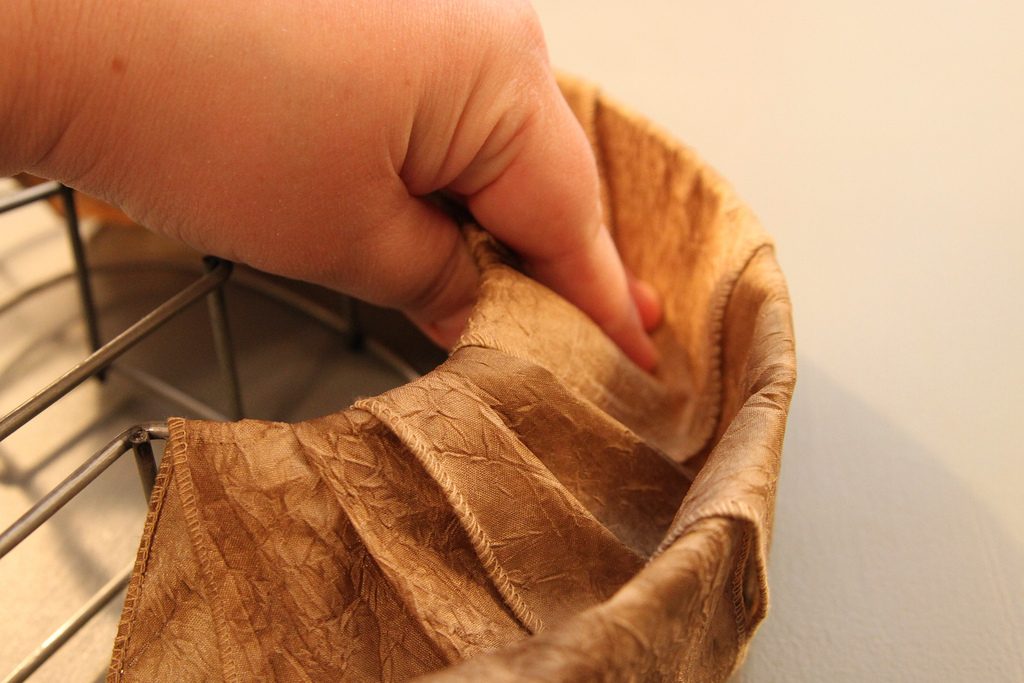
To hold the soil and succulents inside the wreath forms, I wrapped them up with sturdy 2″ wired ribbon. I made sure to leave a little trough for the moss and soil to sit inside the ribbon.
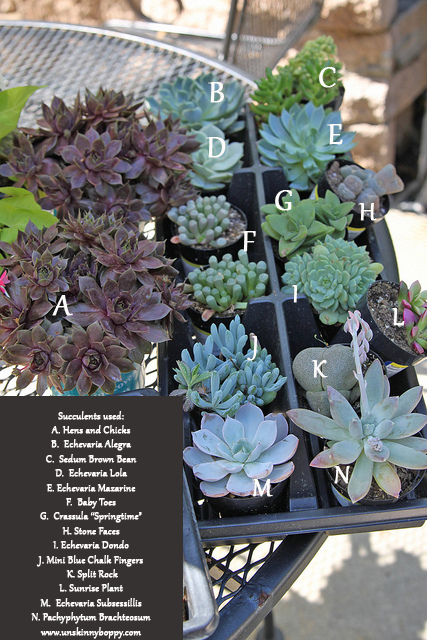
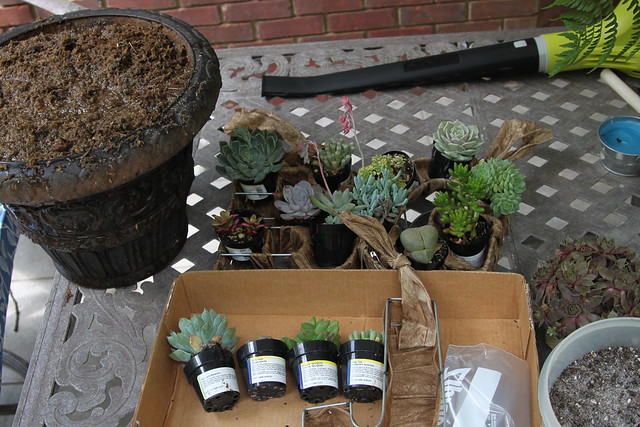
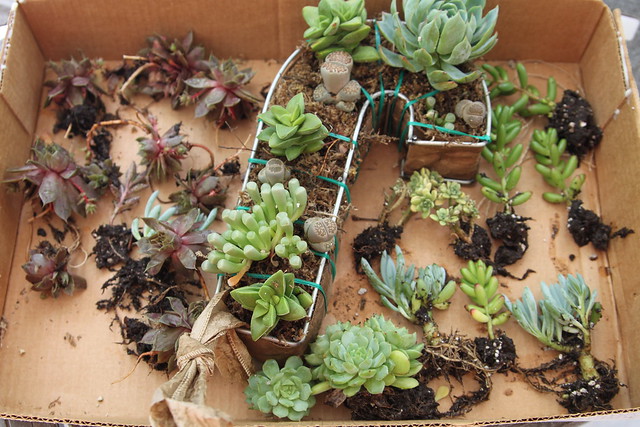
Next came the succulent purchasing. I went to Lowes and bought a big assortment that caught my eye. I tried to vary them in color and texture so they would contrast each other once they were stuffed inside the wreath form.
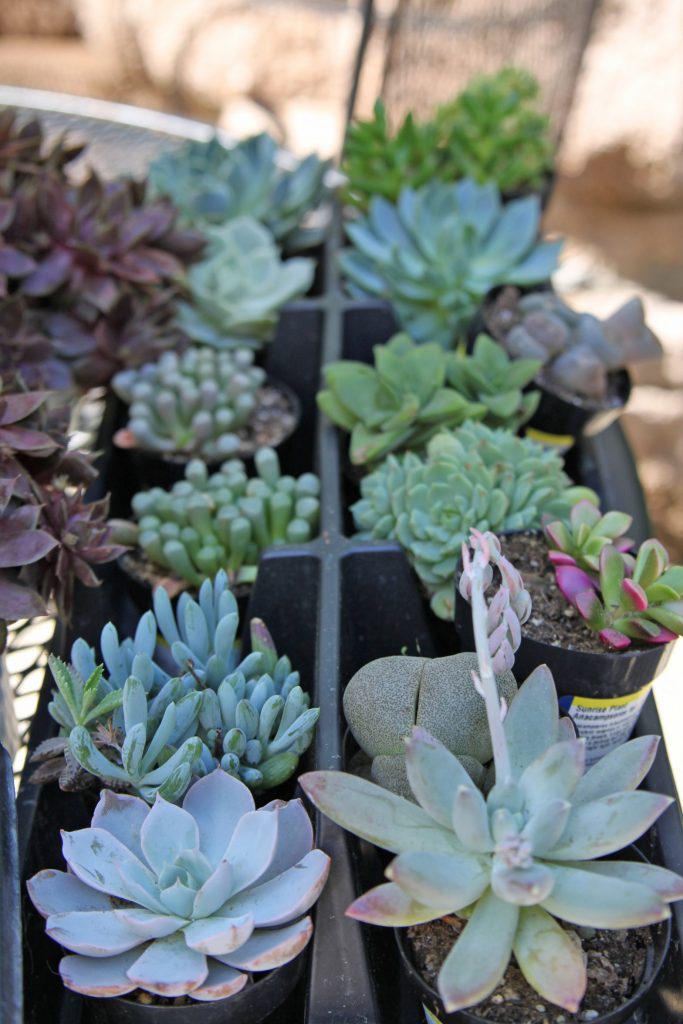
Here are the different succulents I used for this project:
A. Hens and Chicks
B. Echevaria Alegra
C. Sedum Brown Bean
D. Echevaria Lola
E. Echevaria Mazarine
F. Baby Toes
G. Crassula “Springtime”
H. Stone Faces
I. Echevaria Dondo
J. Mini Blue Chalk Fingers
K. Split Rock
L. Sunrise Plant
M. Echevaria Subsessillis
N. Pachyphytum Brachteosum
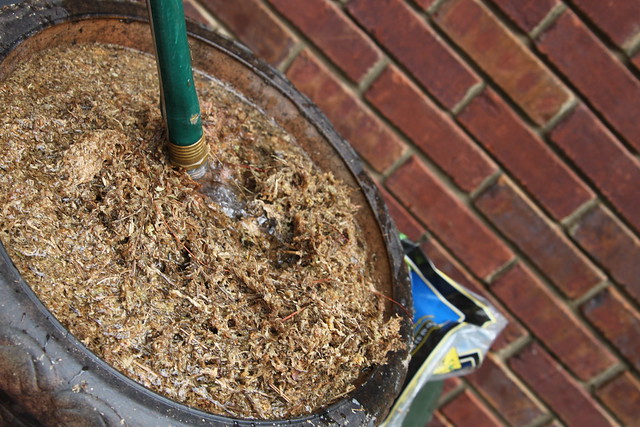
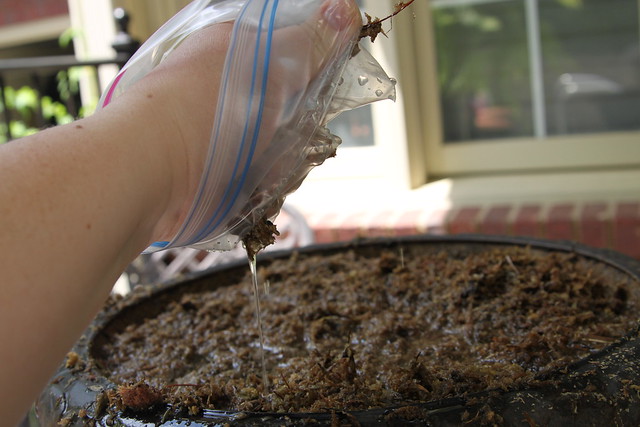
I used sphagnum moss for the lining of the wreath forms. NOTE: wear gloves when working with sphagnum moss because it can contain some kind of bacteria that can do grody things to you if you have an open cut.
You can buy a block of long fibered sphagnum moss on Amazon or in your local garden center. The blocks come dried out so you have to soak them to get the moss to poof back up. I used an empty flower pot since all my buckets were full.

As I was filling the container with water I used the garden hose to poke the moss around and break it up.
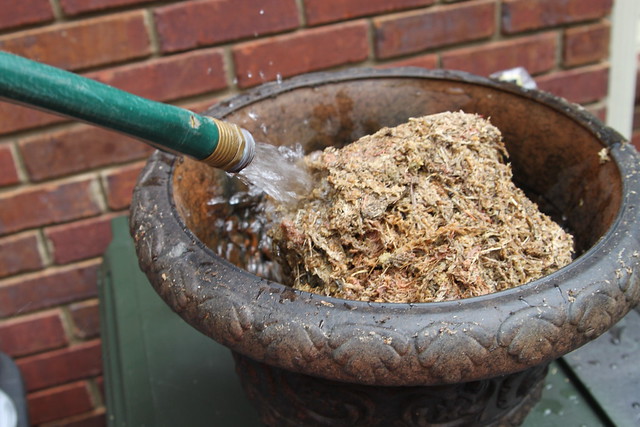
Until it becomes a big pot of sphagnum stew. Let that soak for a while (an hour, preferably, but 15-20 minutes will work.)
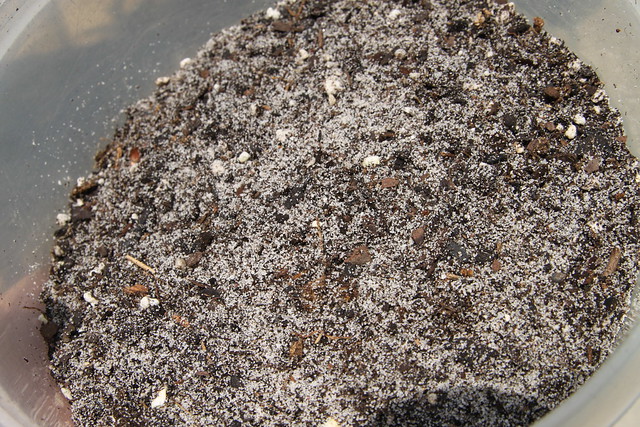
Then I took a few scoops of potting soil and mixed in a few scoops of play sand.

I honestly just guesstimated this part because I’ve read differing opinions on whether this step is needed in a succulent wreath.
Here are all of my ingredients ready to be assembled.
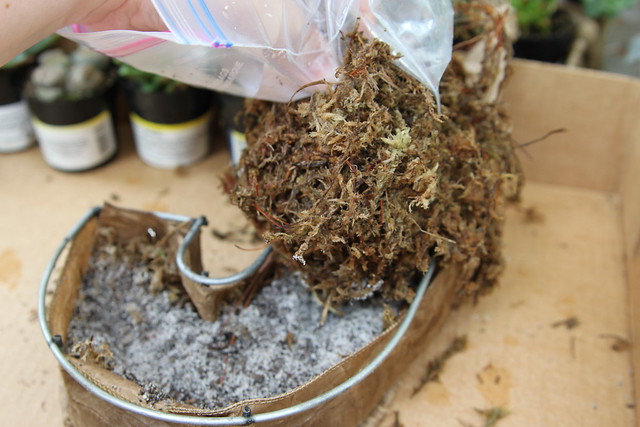
Take a handful of moss and squeeze out the excess water. Don’t forget to wear gloves. Or a ziploc bag if you have recently donated all of your gloves to people in need. 🙂
Spread a layer of moss in the bottom of your wreath form. Pack it in there really good. You’ll be surpised by how much moss you can stuff into these wreaths! Don’t skimp. This is what will support the succulents and also give them water.
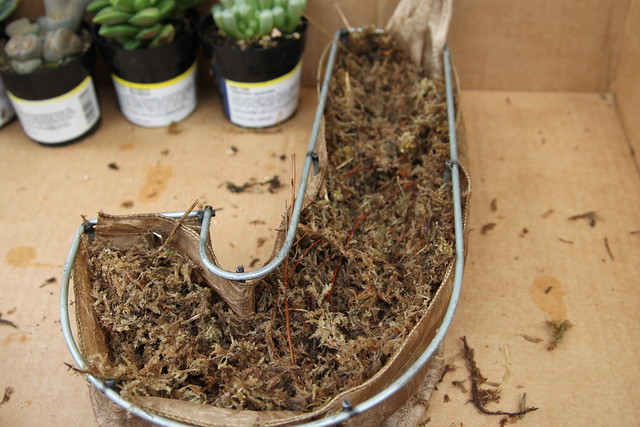
Next comes a layer of your sand/soil mixture.
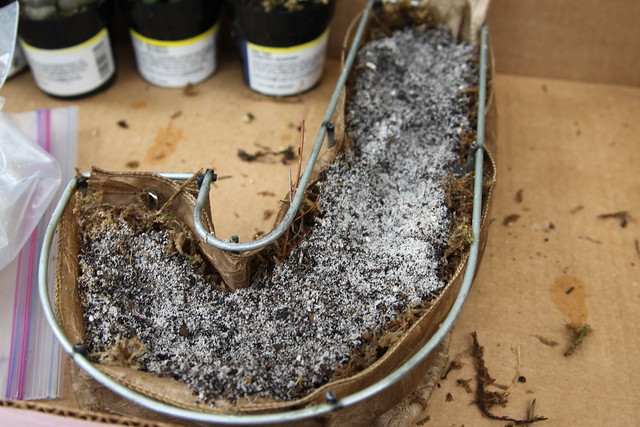
Then another layer of the moss on top.
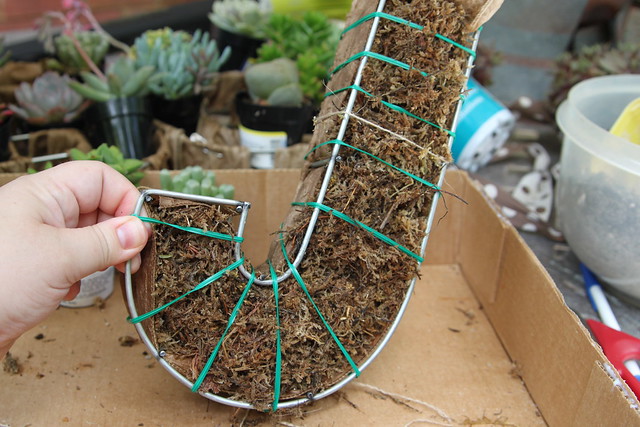
I looked around for twine or jute or wire to wrap around my form but all I could find my garden supplies was this twist-tie stuff. It was way green, but it worked. I decided to use it.
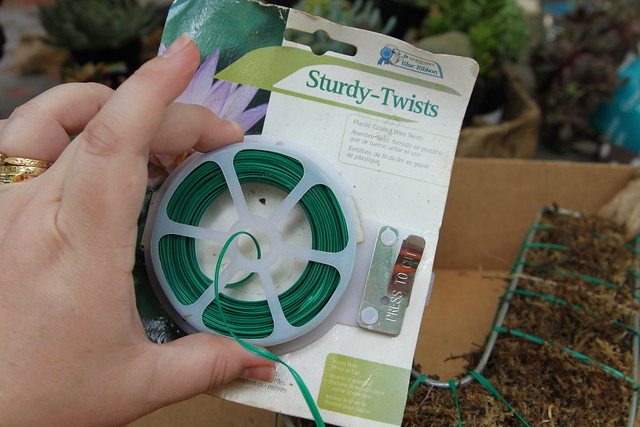
And wrapped it all around the form to hold my sphagnum/sand/soil sammich together.
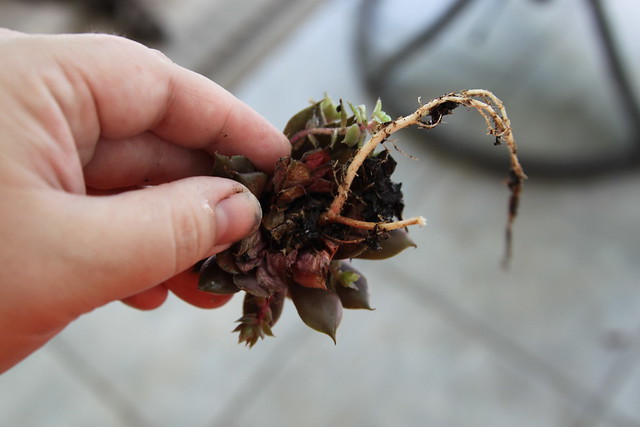
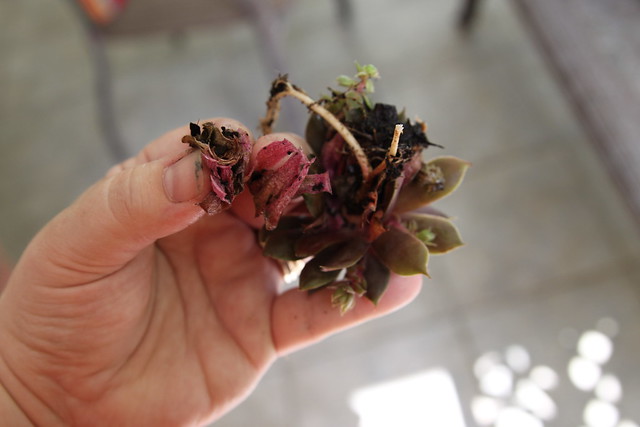
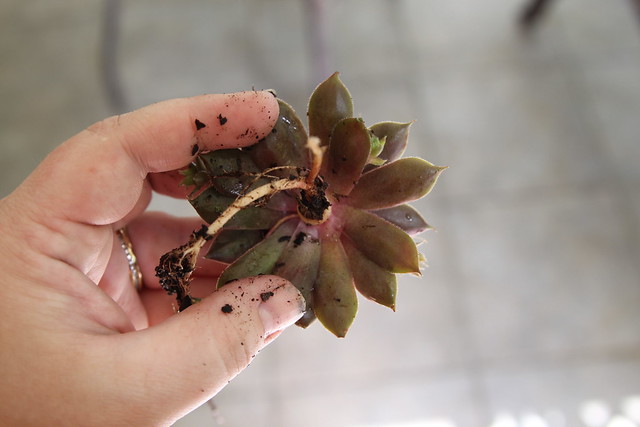
Next I shook my plant roots around in water to get most of the dirt off of the roots. After a while I decided it was easier to run the roots under the hose and rinse them off instead of this bowl/ dipping method.
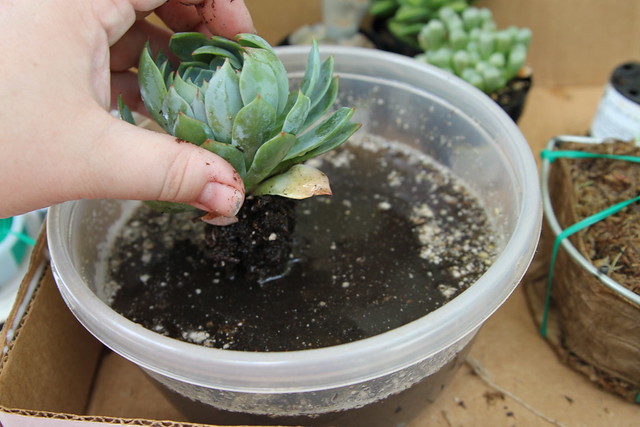
But either way you want to knock off most of the dirt from the roots.
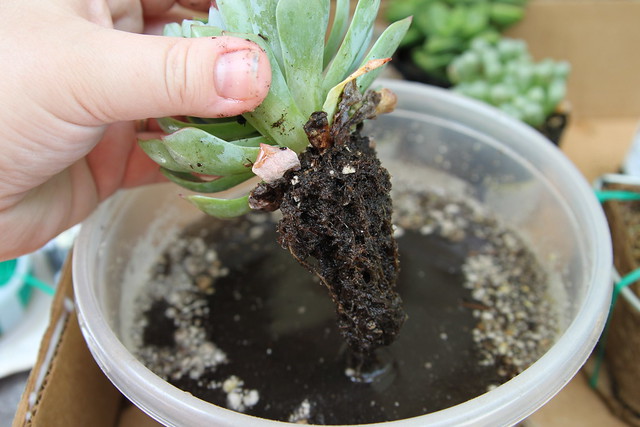
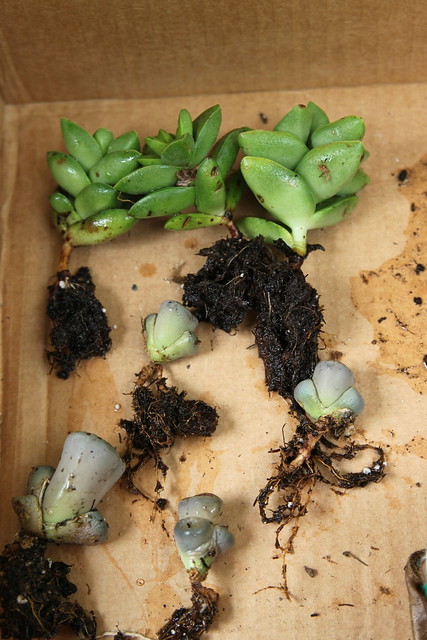
If you are gentle when you will likely be able to separate the roots of the plants into multiple plantings which is great for a wider variety of texture in your wreath.
Then it’s time to start planting! Use a pen, pencil, screwdriver or anything else small and pointy to bore a hole in the moss in a circular motion. Create an opening big enough for your roots.
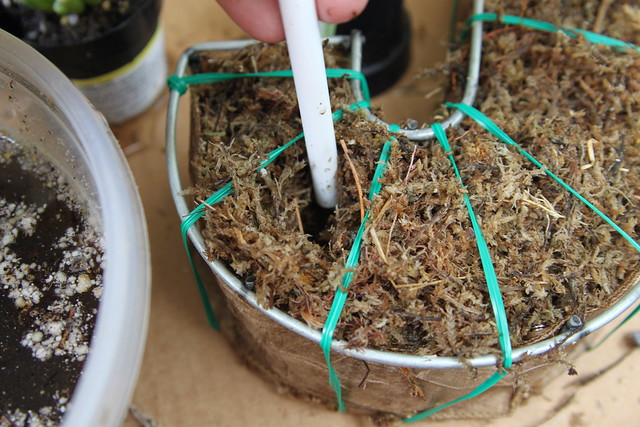
Then guide the roots inside the hole with the pen and situate the plant in firmly. Push the moss back up and around each plant to give it a firm bed.
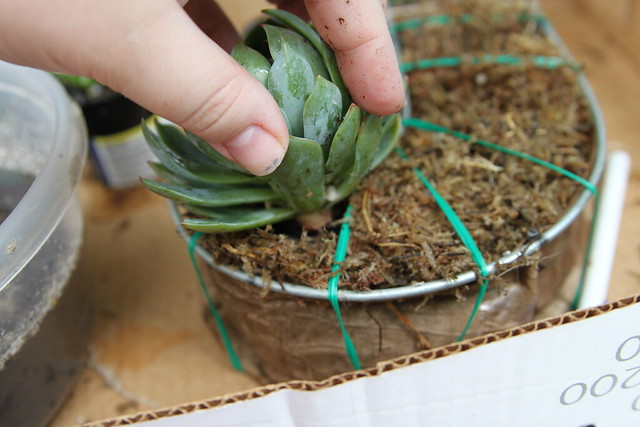
Then just repeat that process over and over until you have all your plants placed inside the moss!

Be mindful of your colors, textures, heights and widths of the plants.
Remember they will grow so leave some space between each one. (Even though I don’t follow my advice on that one most of the time.)
I used hens and chicks as my filler flowers. They are much cheaper than the other succulents because they spread fast and are hard to kill. All of my hens and chicks were over grown so I pruned back a bunch of the dead leaves from around the base. Here is what they looked like before:
With a twist around the base I was able to clean off the dead leaves.
And with a quick rinse they look like this underneath:
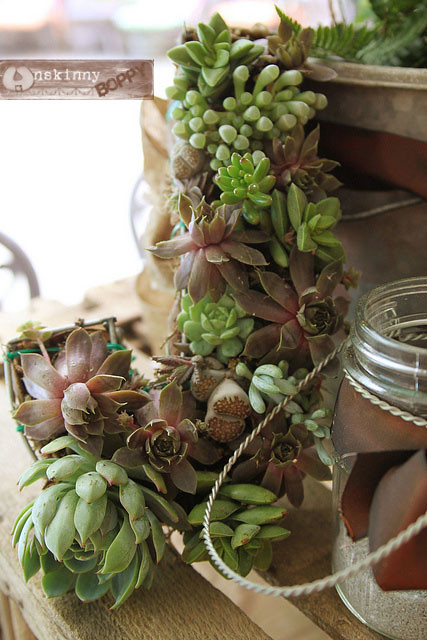
I just kept stuffing plants in there until it looked pretty. There is not pattern or “right” way to do it. Just arrange it however you like it.
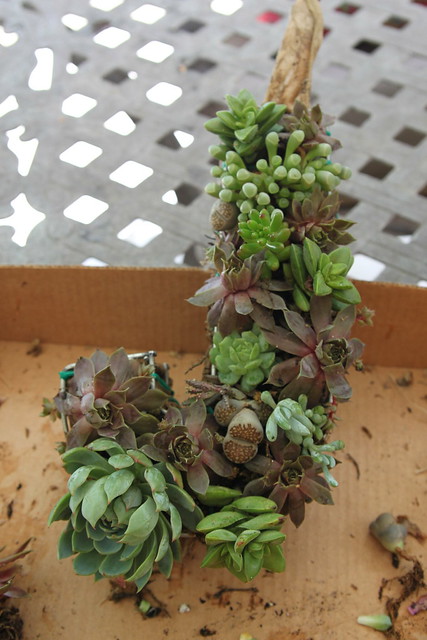
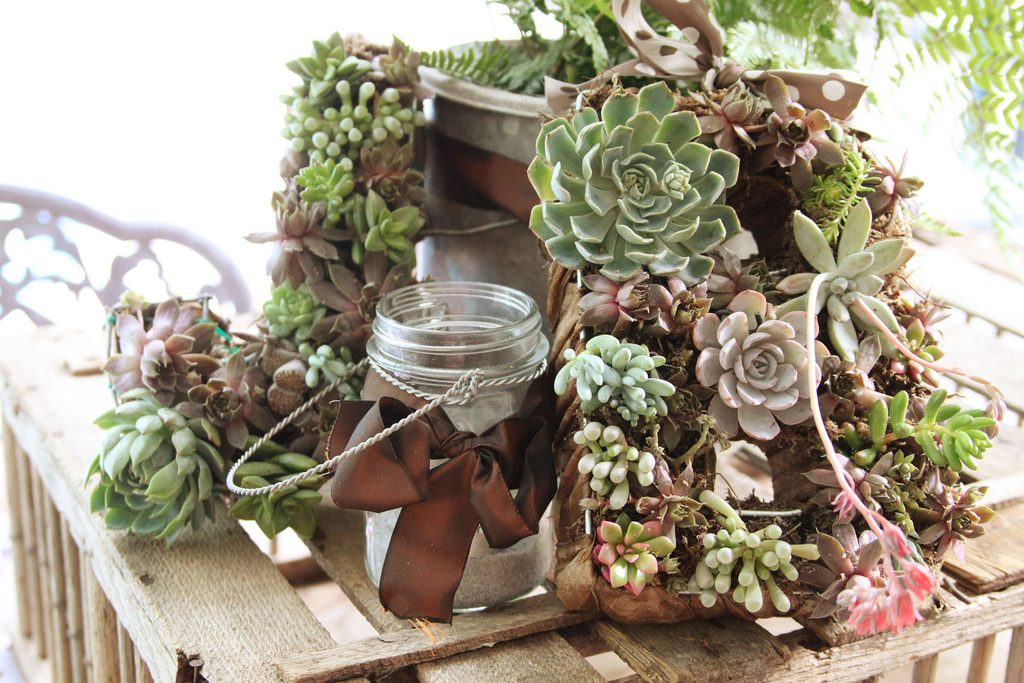
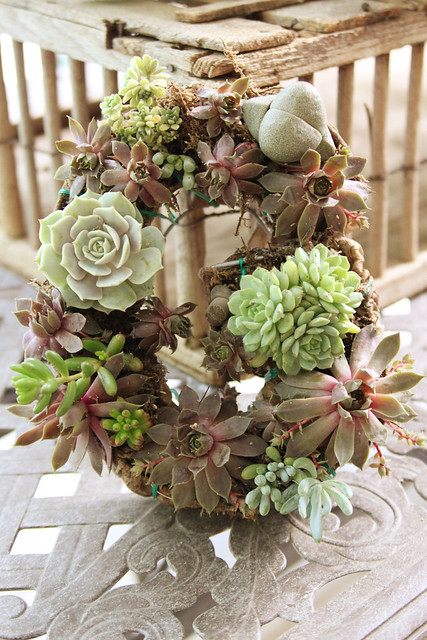
Just consider how your letters are shaped and how the flowers will best follow that shape naturally. Here is my finished “B”. I added a bow on top to pretty her up a little bit.
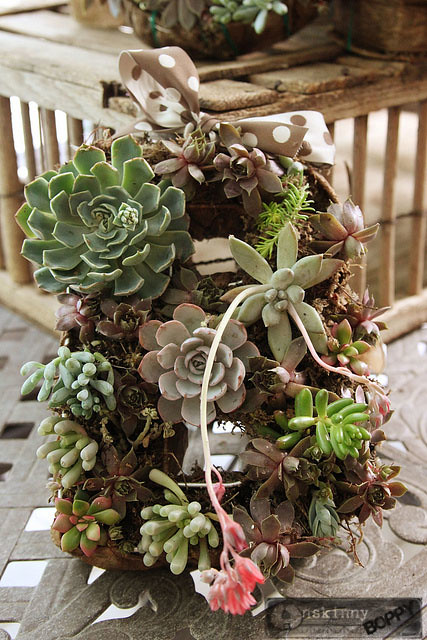
I also made sure I added the pink and flowery ones to my letter since I am the girl of the family. 🙂
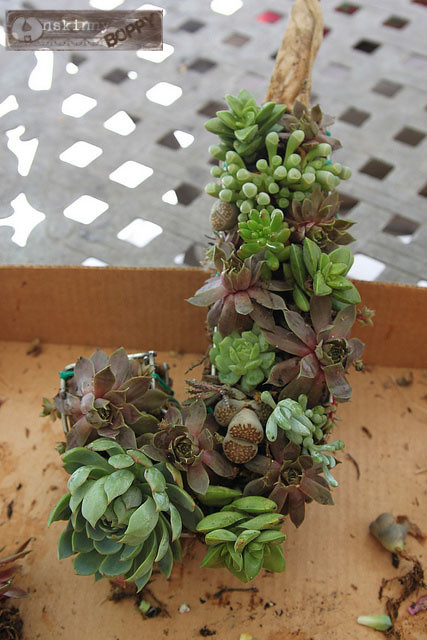
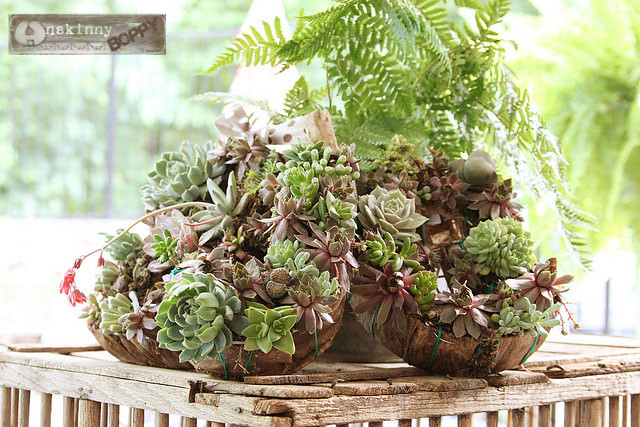
The “G” has some really unusual plants in him.
I love the one that looks like a split rock. Conveniently named “split rock”.
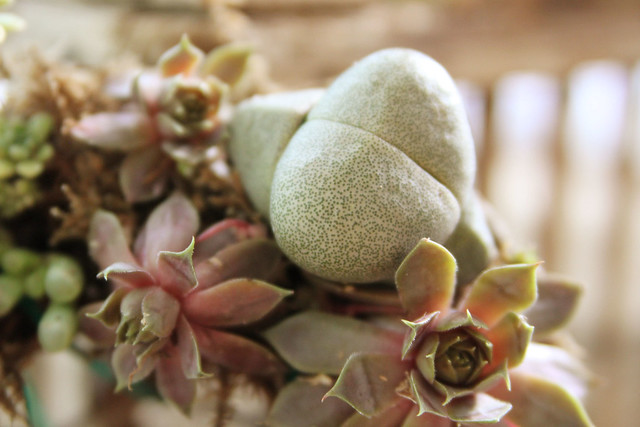
The “J” was a little manlier, too, with more plants that look like rocks. I am so in love with the way these guys turned out!!
Wouldn’t these look great as initials at a rustic wedding reception?? Swoon. What a unique gift you could make for someone.
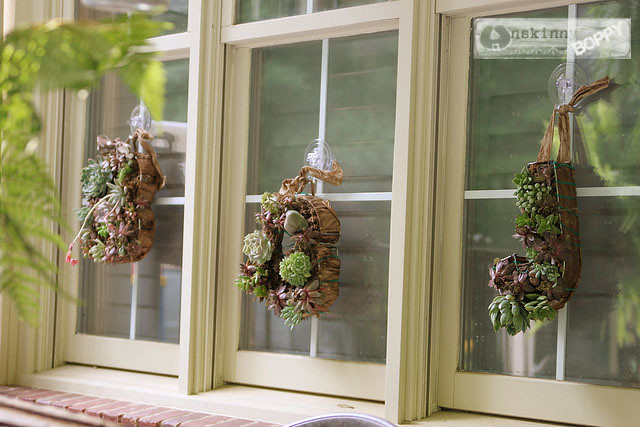
My plan is to hang these wreaths somewhere around my patio or pool. The advantage of succulents is that they can be indoors OR outdoor plants. They are so low maintenance.
I need to pin some of these guys in place and also let them lie flat for a few weeks to let the roots take hold before I hang them for good, but this gives you an idea what they will look like when they are hung. I just love them.
These wreaths look great separate or you can bundle them all together for even more impact. You will lose the letter shapes if you place them close together, but they do give you quite a WOW factor!
Here are some tips to care for your new succulent wreath:
After planting, keep the wreath out of direct sunlight for a week. Gradually increase light levels to full exposure. In the hottest Zones, protect plants from midday sun. Indoors, set your succulent wreath in a south-facing window, greenhouse, or garden room
Water your wreath when it feels dry — every three to 10 weeks, depending on temperature and lighting. Soak the wreath in a container of water for at least one hour. Avoid misting or surface-spraying your wreath; this encourages shallow rooting, which weakens plants.
Hang your wreath using galvanized hardware to prevent rust. If you’ll be displaying your wreath on a wooden surface, such as a door, consider covering the back of the wreath with plastic attached with crafts pins to protect the wood from moisture.
Source- BHG.com
So there you go! The longest post in the history of the world showing you how to make your very own succulent wreath. If you’re a sucker for succulents like me, you will love planting one (or three!) of these in your garden!


These look super and I have been wanting to work with succulents. What would you say is the most difficult thing with “planting” them?
This is just awesome. I love succulents because I’m not a gardener. I love looking at a lovely garden, but do not want to work in it.. I am going to try and make a succulent wreath though. Thank you so much for sharing.
The is an amazing and inspirational article, thanks for sharing
Hi Beth,
Thanks for sharing. I used to live in AZ a couple of years ago and miss all the cactus. Succulents are the way to go. So pretty. I’m thinking of putting some variation of sedum near my water feature here in the foothills of Colorado. Not where it gets wet, but just for the pop of color. You have given me some great ideas, love your work. Hens and chicks are very popular with some neighbors. Lovely plants you have.
Take care and Merry Christmas. I will be checking in and get more great ideas.
Samantha Green